Zerto 4.0 VRA Install and Site Pairing

This is Blog 2 in the Zerto Replication 4.0 series.  This blog will cover the Virtual Replication Appliance (VRA) install as well as Site Pairing.  To find out more about Zerto go to Zerto.com

Current Setup

  • Production Cluster of 2 hosts
  • DR Cluster of 1 host
  • ZVM has been deployed at both sites on Windows 2012 R2

VRA install

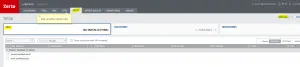
Login to the ZVM interface and go to “Setup” tab.  Click “New VRA” to begin deploying VRAs.
4-2-1

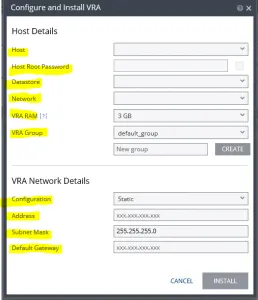
Complete the Host Details for the VRA and Network Details for the VRA then click “Install”.
4-2-2

Once you complete the Install Wizard several things will happen including VRA deployment, DRS rules keeping VRAs on separate hosts and Opening Firewall Ports.
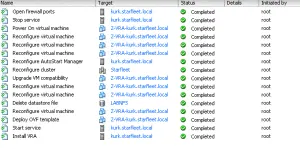
4-2-3

Once you have deployed the VRAs you will see them under the “Setup” Tab.

4-2-4

Do this at you DR site as well. I have setup 1 VRA per host in each cluster.  Now let’s move on to Site Pairing.

Site Pairing

Login to the ZVM interface and go to “Sites” tab.  Select the “Pair” option.

4-2-5

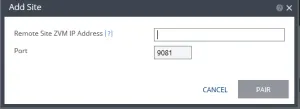
Add Site

4-2-6

Your Sites will pair

4-2-8

At this point you can go to “Sites” in the ZVM and see your DR Site
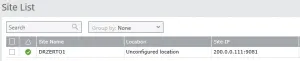
4-2-7

My next blog in the series will cover Virtual Protection Group (VPG) creation

Zerto Virtual Replication 4.0 is Here!!
Zerto released 4.0 in early May and with it came a lot of great new features like on premise replication to AWS and cross hypervisor replication.  The new user interface has been updated to HTML 5.  It is a simpler and easier interface to use when protecting your environment.  You can find out all the info you need on the new features at Zerto.com
This blog series will be focused on installation of Zerto Virtual Manager, VRA deployment, VM protection and failover.
My Home Lab Setup

Hardware

  • 3 Desktop cases
  • 2 Desktops with i5 Processors, 32GB Memory, 1 nic for Management/vMotion, 1 nic for NFS
  • 1 Desktop with Dual Quad Core , 24GB Memory, 1 nic for management, 1 nic for NFS
  • HP 1810 8 port managed switch
  • Synology DS 413j with 2TB disks with Raid 1/0

Setup

  • Prod and DR Cluster
  • 2 hosts in Prod and 1 in DR
  • 1 Domain Controller (2012 R2)
  • 1 Zerto Virtual Manager per site (2012 R2)
  • 1 Zerto Virtual Replicator Appliance per host

You can download the files needed from the Zerto support portal. You will need .Net 4.0 and the Zerto Virtual Replication Installer.

Z4-1

Installation

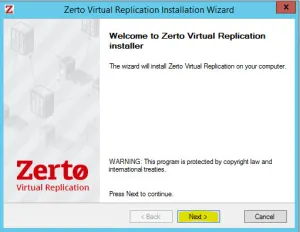
Launch the Zerto Virtual Replication Installer

Z4-2

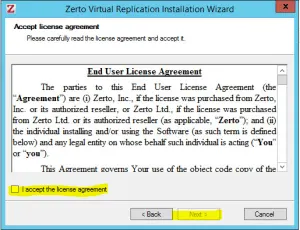
Accept the License Agreement

Z4-3

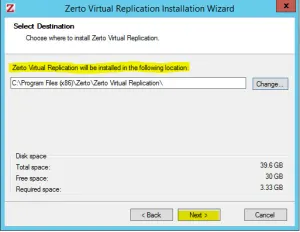
Select Destination

Z4-4

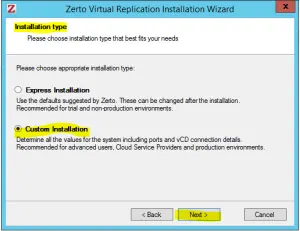
Choose the Installation type.  I will be doing the Custom Install as it is recommend for production environments.

Z4-5

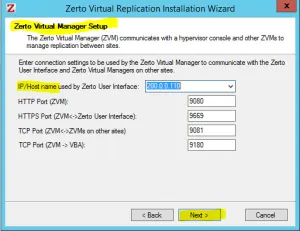
ZVM Setup.  Enter the connection settings for the ZVM including all of the required ports.

Z4-6

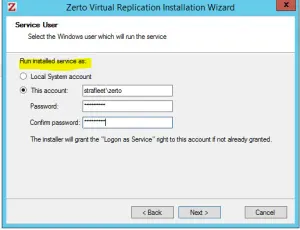
Select the Service User Account. I setup a local account called “Zerto” and made it a local admin.  I like creating separate service accounts just for the purpose of logging.

Z4-7

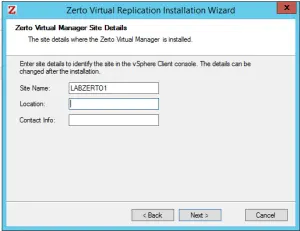
Add in the Site Details

Z4-8

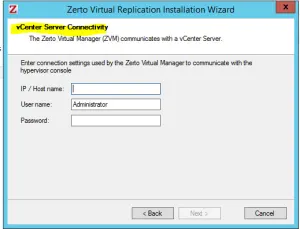
vCenter Server Connectivity.

Z4-9

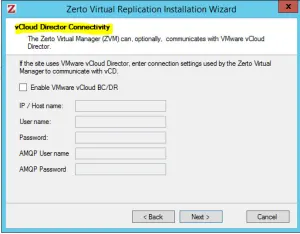
ZVM has the ability to connect to VMware vCloud Director.  Leave the option unchecked.

Z4-10

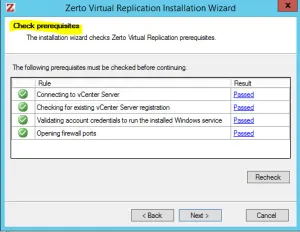
At this point the installer will proceed with checking the prerequisites.  It will check vCenter connectivity, Window Service Account and open any firewall ports if needed.

Z4-11

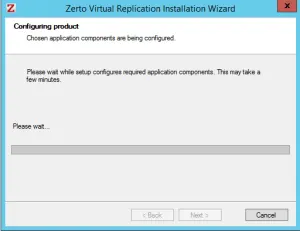
Configuration will then take place

Z4-12

Once the Configuration has completed you can login to the ZVM Interface.  You will be prompted for a License and that point.

Z4-13

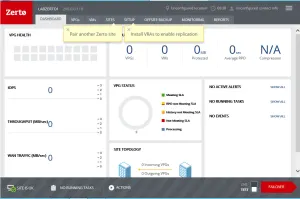
Below is the New User Interface.

Z4-14

As you can see the ZVM install is as simple as it has always been.  You will need to do the same setup at your DR location.  My next blog will cover VRA installation and Site Pairing.

RPA Communication Security Level

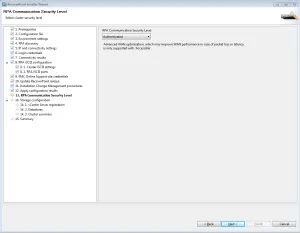
I was recently installing RecoverPoint and I ran across something that I have never seen before.  During the Deployment Manager setup step 13 is “RPA Communication Security Level”.

RP Security WAN

RecoverPoint 4.1.1 now supports Message Passing Interface (MPI) security for communication between RPA clusters. RecoverPoint MPI security offers the following RPA communication security levels:

Accessible – Communication between RPA clusters is not authenticated or encrypted. However, RPA clusters can communicate with each other only by adhering to the RecoverPoint proprietary protocol.

Authenticated – RPA clusters use certificates to authenticate each other before communicating. This option minimally impacts RPA performance.

Authenticated and Encrypted – RPA clusters use certificates to authenticate each other before communicating. All communication between RPA clusters is also encrypted.

RecoverPoint for VMs – Test Copy

EMC RecoverPoint for VMs is a virtualized hypervisor-based replication and disaster recovery solution that is integrated into the VMware. Virtual RecoverPoint appliances is installed on existing ESXi servers with and ESXi splitter that resides on all servers with protected workloads, allowing replication and recovery at the virtual disk (VMDK and RDM) level. Since the I/O splitter resides within the vSphere hypervisor, RecoverPoint for VMs can replicate VMs to and from any storage array supported by VMware: SAN, NAS, DAS, and vSAN.

This blog will cover Testing Copies but first you must have the following prereqs completed.

  • ESXi splitter installed on each esxi host
  • iSCSI network setup
  • vRPAs deployed at each site
  • RP clusters deployed
  • RP Datastore Journals at each site registered
  • Consistency Groups have been created and is fully initialized

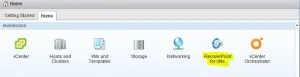
RPforVMs is accessed via the Web Client and there is not thick client option.  The vSphere Web Client Plugin is installed once the RP cluster has been deployed

VMPRO1

Testing a Copy

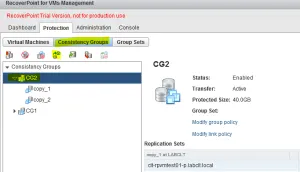
Login to RPforVMs and go to the Protection Tab.  Select your Consistency Group that you want and select the Test Option

VMRPTEST1

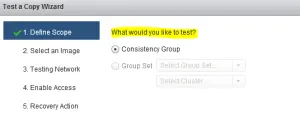
Define the Testing Scope.  Consistency Group or Group Set.

VMRPTEST2

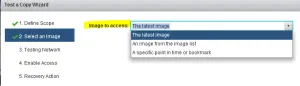
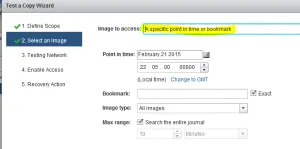
Select the Point-in-Time you want to access. You have 3 Options

Latest Image

VMRPTEST3

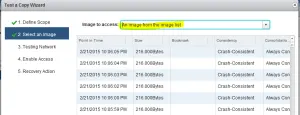
An Image from the Image List

VMRPTEST4

Specific Point in Time

VMRPTEST5

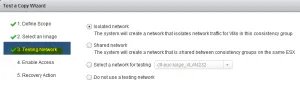
The next step is to define your Testing Network.  I usually create a vswitch and do not attach a physical nic to it.  The different options are listed.

VMRPTEST6

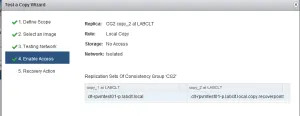
Summary for the Enable Image Access

VMRPTEST7

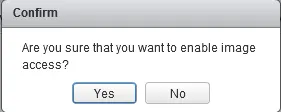
Confirm

VMRPTEST8

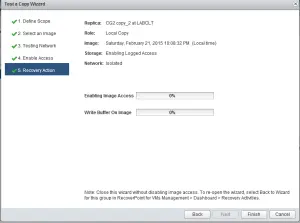
The Recovery Action will now begin

VMRPTEST9

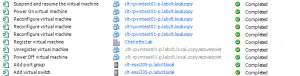
Several things will begin to happen.  If you select the Isolated Network option vCenter will add a vSwitch and Port Group.  The .copy.recoverpoint place holder will be removed and the Targer VM will be registered with the .copy extension.

VMRPTEST10

After all of this the VM is up and running and is ready for your testing.

VMRPTEST11

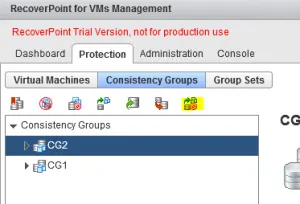
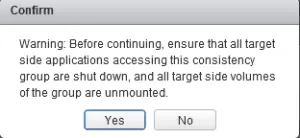
After you have completed your testing and ready to tear it back down go back to the Consistency Group and Disable Image Access

VMRPTEST12

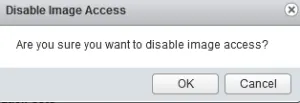
Confirm

VMRPTEST13

VMRPTEST14

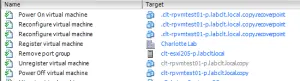
At this point the Target Copy will be removed, Test vSwitch will be deleted, and the place holder will be added back to Inventory

VMRPTEST15

Placeholder is powered back on and Testing has been completed.

VMRPTEST16

The Next blog will cover the process of “Recovering Production”

RecoverPoint for VMs – VM Protection

EMC RecoverPoint for VMs is a virtualized hypervisor-based replication and disaster recovery solution that is integrated into the VMware. Virtual RecoverPoint appliances is installed on existing ESXi servers with and ESXi splitter that resides on all servers with protected workloads, allowing replication and recovery at the virtual disk (VMDK and RDM) level. Since the I/O splitter resides within the vSphere hypervisor, RecoverPoint for VMs can replicate VMs to and from any storage array supported by VMware: SAN, NAS, DAS, and vSAN.

This blog will cover protecting VMs but first you must have the following prereqs completed.

  • ESXi splitter installed on each esxi host
  • iSCSI network setup
  • vRPAs deployed at each site
  • RP clusters deployed
  • RP Datastore Journals at each site registered

RPforVMs is accessed via the Web Client and there is not thick client option.  The vSphere Web Client Plugin is installed once the RP cluster has been deployed

VMPRO1

Protecting VMs

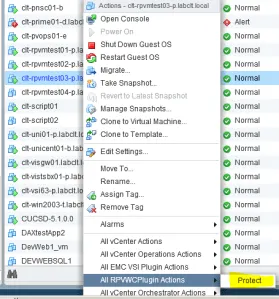
Right-click on a VM, All RPVWCPlugin Actions, Protect

VMPRO2

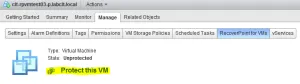
You can also go to Manage and then RecoverPoint for VMs

VMPRO3

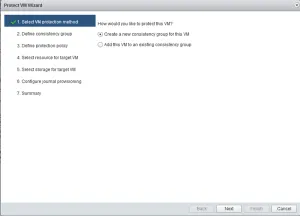
Protect VM Wizard begins.  Start with creating a new Consistency Group or add to an existing Consistency Group.

VMPRO4

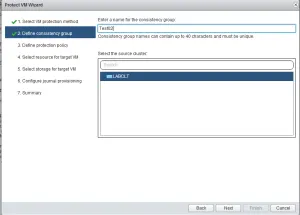
Enter a name for the Consistency Group and select the source cluster

VMPRO5

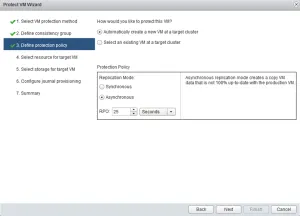
Define the Protection Policy.  Create a new VM or an existing VM and set the replication mode.

 VMPRO6 

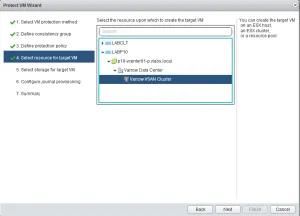
Select the resource where the target VM is to be created

VMPRO7 

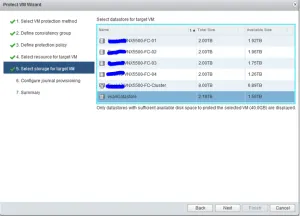
Select the Target Datastore

VMRPO8 

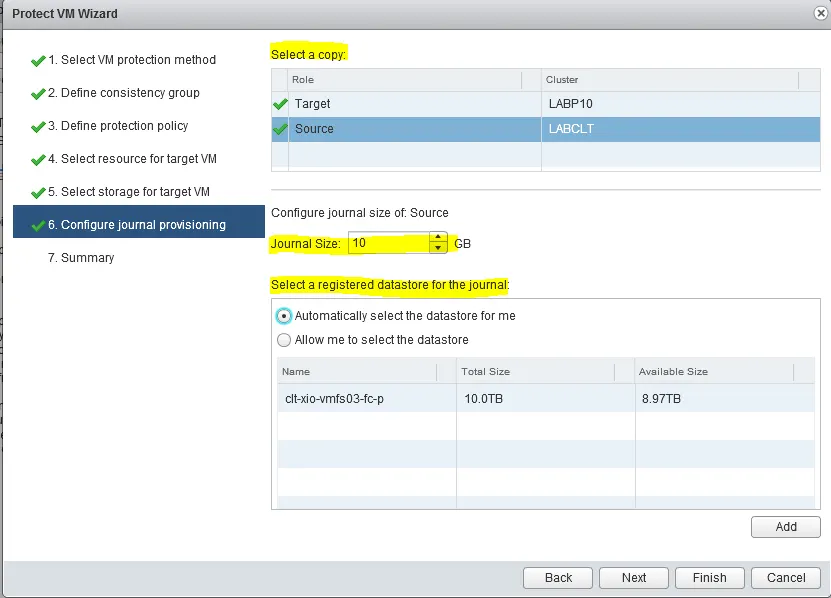
Configure the Journals for both the Source and Target.

VMPRO9 

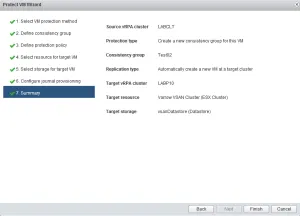
Complete the Protection Wizard

VMPRO10

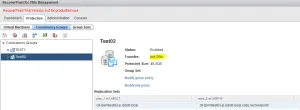
Initialization Process will begin.  There are 2 options: Modify Group Policy and Modify Link Policy

VMPRO11 

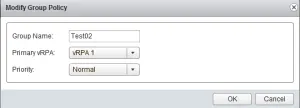
Modify Group Policy.  Here you can specify the vRPA and the Priority Level.

VMPRO12

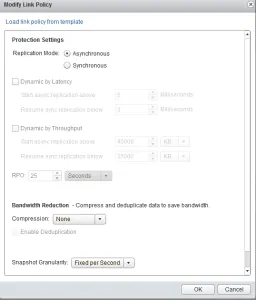
Modify Link Policy.  Here you decide the Replication Mode as well as the Bandwidth Reduction. Compression and dedup requires 8 vCPU and 8GB Memory on each vRPA.

VMPRO13

You can go back to the RecoverPoint for VMs tab and monitor the Replication process.  A VM will be created at the target with a .copy.recoverpoint added to it.

VMPRO14

My next blog will cover Testing a Copy

RecoverPoint for VMs – Prerequisites

EMC RecoverPoint for VMs is a virtualized hypervisor-based replication and disaster recovery solution that is integrated into VMware. Virtual RecoverPoint appliances is installed on existing ESXi servers with and ESXi splitter that resides on all servers with protected workloads, allowing replication and recovery at the virtual disk (VMDK and RDM) level. Since the I/O splitter resides within the vSphere hypervisor, RecoverPoint for VMs can replicate VMs to and from any storage array supported by VMware: SAN, NAS, DAS, and vSAN.

The necessary prereqs and vRPA hardware Specs are defined below.

ESXi Splitter

The RecoverPoint for VMs splitter is the software installed on every ESXi server in an ESXi cluster involved with RecoverPoint replication or running virtual RPAs. The RecoverPoint for VMs splitter splits every write to the VMDK and sends it first to the vRPA.  The splitter is a .vib file (kdriver_RPESX-00.4.2.0.m.92.000.vib) that comes with the RecoverPoint for VMs 4.2 Installation Kit.  800MB of RAM is required on each host for the splitter.

Instructions for installing the splitter is listed below.

  1. Put your first host in maintenance mode and vMotion all VMs to a different host.
  2. Use an SSH client with secure copy protocol (ex. WINSCP) to root and copy the kdriver_RPESX-00.4.2.0.m.92.000.vib file to the Scratch folder.
  3. On the ESXi host, set the acceptance level to Community Supported. This allows the ESXi hosts to accept custom vSphere Installation Bundles.

esxcli software acceptance set –level=CommunitySupported 

  1. Install the ESX Splitter

esxcli software vib install -v /scratch/ kdriver_RPESX-00.4.2.0.m.92.000.vib 

  1. Reboot the Host
  2. To confirm the splitter login to the ESXi host with root and run this command:

esxcli software vib list 

  1. The Splitter will show up at the top

Splitter

  1. Exit Maintenance mode and migrate the VMs back.
  2. Repeat this process for all VMs in the Cluster

iSCSI Settings

To allow the ESXi server to communicate with vRPAs, create a Software iSCSI Adapter and then two VMkernel ports on each ESXi server that will run vRPAs.  Assign IP addresses that are on a routable subnet or on the same subnet as the vRPA iSCSI interfaces that will be assigned when deploying the vRPA cluster. The best practice is to create two VMkernel adapters for each software iSCSI adapter.  Add the iSCSI IP addresses of the vRPAs to the Dynamic Discovery tab in the iSCSI initiator section.

vRPA Hardware Specifications

  • vCPUs
    • 2, 4 or 8. 8 is needed for deduplication.
  • Memory
    • 4GB or 8GB. 8 GB is needed for deduplication.
  • NICs (4 total)
    • 1 LAN
    • 1 WAN
    • iSCSI 1
    • iSCSI 2
  • Disk Space
    • 80GB Disk Space
    • 3GB needed for repository volume. This Datastore needs to be shard across all hosts in the cluster
  • VMware Environment
    • 1U1 or 5.5. I would recommend vSphere 5.5.

My next blog will cover Protecting VMs.

What’s New in VMware Site Recovery Manager 5.8

VMware released Site Recovery Manager 5.8 with the release of vSphere 5.5 Update 2.  VMware SRM 5.8 improves with increased scalability and customization. Below is a list of the New Features.

  • SRM has been integrated into the vSphere Web Client.
  • vCenter Orchestrator for SRM which allows some automation in vCenter Orchestrator workflows
  • Now protect up to 5,000 VMs
  • Subnet level IP customization
  • Optional embedded database that can be used instead of an external Database