New Features and Changes in RecoverPoint 4.4

One of the many technologies that i work with on a regular basis is EMC RecoverPoint. Code 4.4 was just released and i wanted to share the new features and changes.

ProtectPoint 3.0 readiness

RecoverPoint now contains the infrastructure required to support ProtectPoint 3.0 when it becomes generally available. This readiness enables ProtectPoint 3.0 to support the protection of data located on XtremIO arrays. See the ProtectPoint 3.0 Solutions Guide and the ProtectPoint 3.0 Primary and Protection Storage Configuration Guide when they become available for more information on the RecoverPoint integration in ProtectPoint.

Volumes can be added to groups without journal loss

When adding replication sets to an existing consistency group, the journal history is retained.

IPv6

RecoverPoint 4.4 has been qualified for use with IPv6 addressing. IPv6 is supported for all endpoints on the LAN, the WAN, gateways, subnets, VNX arrays, CX4 arrays, and XtremIO arrays.

EMC WAN Optimization Components (EWOC)

EWOC is not supported in RecoverPoint 4.4. If EWOC was enabled in a RecoverPoint version prior to 4.4, it will be automatically disabled during upgrade to RecoverPoint 4.4.

Multiple array support for XtremIO

The RecoverPoint/SE license now supports multiple XtremIO arrays per cluster.

Allow RecoverPoint to Manage Volume Access

Since XtremIO replica volumes are not managed by a RecoverPoint splitter, they are normally accessible, even when image access is disabled. External hosts accessing replica volumes can cause data corruption. From XtremIO 4.0.2 and later, RecoverPoint manages the access state of these volumes, and blocks write access to hosts, unless the volumes are in Image Access mode.

Auto-registration enhancements

Many enhancements have been added to the RecoverPoint automatic registration mechanism. Among them, a call home event is now automatically sent to the EMC IB group whenever a cluster removed from or added to the system, and whenever a change is made to one of the details in the registration form.

Improvements in system feedback during image access

When accessing, failing over to, or recovering production from an image to a point in time that does not contain all of the replication sets that exist at the current point in time, new messages (and alerts) are now displayed to help users better understand the implications of image access.


New security features

Key management

Random SSH keys are generated during a new RecoverPoint installation and regenerated every time the regenerate_encryption_keys command is run.

Authentication secrets management

During RecoverPoint installation, you will be prompted for the local users’ security level. There is no default value. When Security Level is set to High, passwords of predefined users (admin, security-admin, and Boxmgmt) must be changed immediately. LDAP authentication is not affected.

Session inactivity timeout

By default, a RecoverPoint GUI session will time out after 10 minutes. After timeout, user will need to log on with password to access GUI again. Session timeout can be changed by user with security role privilege.
Configuring EMC RecoverPoint GEN5 BMC or “Lights Out Management”

One of the options with RecoverPoint GEN5 appliances is the BMC option or what most known as “Lights Out Management”.  This can be very useful as IT offices and Datacenter’s where the equipment reside may be in different locations.  Below are the steps for setting up BMC on each RPA.

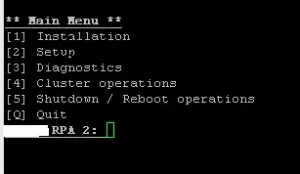
Login with user “Boxmgmt” and choose Setup [2]

screenshot.1

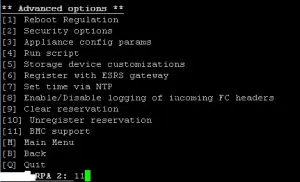
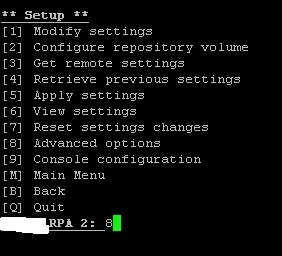
Choose Advanced Options [8]

screenshot.3

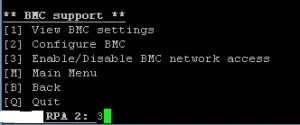
Choose BMC Support [11]

screenshot.4

First enable the BMC Network Address [3]

screenshot.5

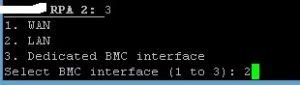
Select the interface you want to use BMC

screenshot.6

BMC will be enabled.  Make sure not to disable it.

screenshot.7

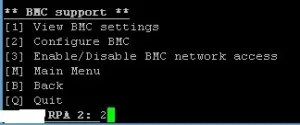
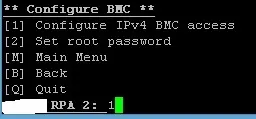
Now that BMC is enabled you need to configure the IPs [2]

screenshot.8

Configure IPv4 BMC Access [1]

screenshot.9

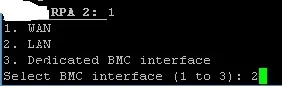
Select the BMC Interface that you enabled before

screenshot.10

Specify the DHCP option

screenshot.11

Specify IP

screenshot.21

Specify Mask

screenshot.12

Specify Gateway

screenshot.13

The operation will take about 60 seconds or so

screenshot.14

Confirm activating the IP

screenshot.15

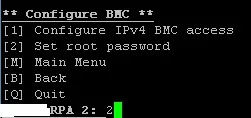
Last Step is to specify a Root Password [2]

screenshot.16

Enter password

screenshot.17

Confirm Password

screenshot.18

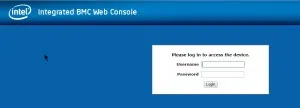
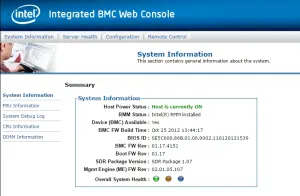
At this point you can now login to the BMC or “Lights Out Management” by browsing to the IP. Login with the Root account created.

screenshot.19

You can now manage the RPAs with BMC

screenshot.20

Zerto 4.0 VPG Failover

This is Blog 5 in the Zerto Replication 4.0 Series.  This blog will cover the Virtual Protection Group (VPG) Failover.

Current Setup

  • Production Cluster of 2 hosts
  • DR Cluster of 1 host
  • ZVM has been deployed at both sites on Windows 2012 R2
  • VRAs have been installed at each site
  • Sites have been paired
  • VPG’s have been created
  • A test failover has been completed

VPG Failover

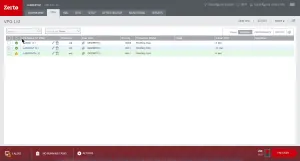
Login to the Zerto Interface and go to the VPG Tab.  Make sure the “Failover” option is selected and click Failover.

screenshot.1

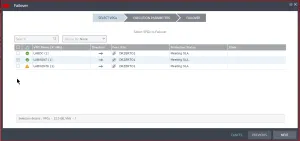
Failover window will pop up. Select you VPGs that you want to failover and select next.

screenshot.2

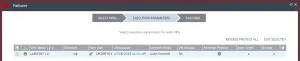
Review the Execution Parameters.  Make sure to choose the “Revers Protect All” option.  This will start protection again once the VPG has failed over

screenshot.4

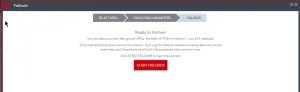
You are now ready to failover

screenshot.5

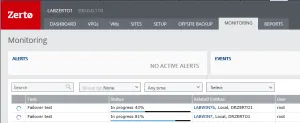
After you have started the failover go to the Monitoring Tab and observe the failover progress.  It will go thru several steps.

screenshot.8

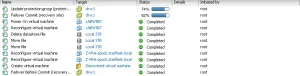
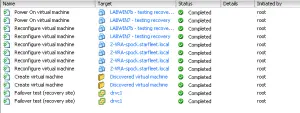
Once you have started the failover you can observer the steps in vCenter at the protection site.

screenshot.9

Once the failover has completed the Delta Sync (re-protect) will start.
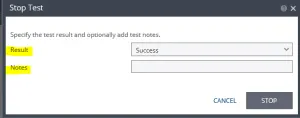
screenshot.12

Once the sync is complete the direction of the replication will show up under the VPG List

screenshot.13

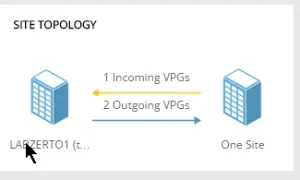
The Site Topology on the dashboard will now show replication going in both directions

screenshot.16

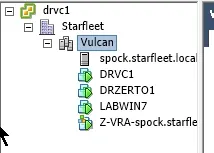
Now the VM “Labwin7” now resides at the DR Site

screenshot.11

My next blog will cover the new management interface and its changes.

RecoverPoint for VMs 4.3 – New Features and Changes

RecoverPoint for VMs 4.3 has been released with a lot of new features and changes.  This blog will outline all of them with the hope of doing some demos in the future.

Multi-cluster support

RecoverPoint for VMs 4.3 now supports up to three copies (including the production copy) per consistency group and up to three vRPA clusters per RecoverPoint for VMs system, enabling concurrent local and remote replication.

VC licensing

RecoverPoint for VMs licenses are now per vCenter Server (as opposed to per vRPA cluster), enabling multiple vRPA clusters connected to a single vCenter Server to share the same license.

Deployment Automation with REST API

Enterprise users and service providers can use the new REST API to perform the following system deployment actions automatically:

  • Download RP4VMs OVA image files.
  • Import OVA image files via vCenter wizard.
  • Configure vRPA networking (including IP address and connectivity to ESXi).
  • Open web interface and configure vRPA cluster in DM flow.
  • Pair between two clusters using credentials.
  • Receive operation status.
  • Register vCenter plug-in.
  • Install ESXi splitter without rebooting the ESXi.

Orchestration

  • Disk provisioning of copy VMs

When creating consistency groups users can now select the type of VMDK to use for the copy VMs. Possible options are thin, thick, or same as source. Default is same as source.

  • Expansion of VMDKs

VMDKs can now be expanded without loosing the journal or causing a full sweep for the entire consistency group in cases where users want to add additional space to protect the VMDK.

  • Exclusion of VMDKs

VMs containing VMDKs that are shared or non-persistent can now be replicated, as such VMDKs can now be excluded from replication.

  • Automatic replication of VMDKs

VMs can now also be configured to include newly added VMDKs from replication automatically.

  • Adding a VMDK without journal loss

Replication sets can now be added to a consistency group without causing journal loss or a full sweep.

  • Replicating VM hardware changes

Each production VM’s hardware resources (such as CPU, memory, etc.) can now automatically be replicated to its copy VM during image access.

Start-up sequence

Users can now define the power-up order of VMs in a consistency group (and consistency groups in a group set) as image access is enabled when testing a copy, failing over, or recovering production. VMs can also be marked as critical to stop the start-up sequence if that VM doesn’t power up.

  • User prompts

You can now define messages that must be acknowledged by RecoverPoint for VMs administrators before and after each VM’s power-up.

  • User scripts

You can now save and run scripts before and after powering on VMs by defining an external host per vRPA cluster in a RecoverPoint for VMs system.

  • Networking enhancements

All of the networking details of the VMs in a RecoverPoint for VMs system, or the VMs at a copy in a RecoverPoint for VMs system, can now be imported and automatically applied, or exported for future use.

Application-consistent bookmark support via VSS

Application-consistent bookmarks can now be created on every VMware-based virtual machine in its own consistency group that uses VSS and is running Windows 2008 or 2012 R2.

Scale and performance improvements

RecoverPoint for VMs 4.3 supports increased scale and performance, including the following scale improvements:

Parameter 4.2 4.3
Maximum number of vRPA clusters connected to a vCenter server 2 4
Maximum number of VMs that can be registered in the

inventories of all vCenters connected to a vRPA cluster

1024 5120
Maximum number of protected VMs in a vCenter 300 1024
Maximum number of protected VMDKs per vRPA cluster 1024 2048
Maximum number of protected VMDKs per ESXi cluster 2048 4096
Maximum total number of ESXi hosts with a splitter 16 32
Maximum number of ESXi clusters connected to a vRPA cluster 2 4
Maximum number of Consistency Groups per vRPA

cluster

64 128
Maximum number of VMs per Consistency Group 16 128
Maximum number of replica sites per RecoverPoint for

VMs system

1 2
Maximum number of replica copies per Consistency

Group

1 2
Maximum capacity of a single VMDK 2TB 10TB
Total max capacity of a replicated VM 8TB 40TB


Getting started wizard

A wizard is now automatically displayed after the initial installation of a RecoverPoint for VMs system to guide users through the process of licensing and registering their RecoverPoint for VMs system and enabling support. This wizard is also displayed when adding the first license using the main RecoverPoint for VMs Management > Administration > Licenses screen.

Recovery activity reports

For each recovery activity a detailed report can now be displayed including the final status of each step, as well as the overall status, of the recovery activity.

EMC Storage Analytics (ESA) supports RecoverPoint for VMs

Zerto 4.0 VPG Test Failover

This is Blog 4 in the Zerto Replication 4.0 Series.  This blog will cover the Virtual Protection Group (VPG) Test Failover.

Current Setup

  • Production Cluster of 2 hosts
  • DR Cluster of 1 host
  • ZVM has been deployed at both sites on Windows 2012 R2
  • VRAs have been installed at each site
  • Sites have been paired
  • VPG’s have been created

VPG Test Failover

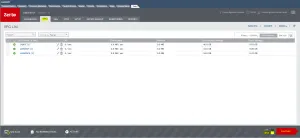
Login to the Zerto Interface and go to the VPG Tab.  Make sure the “Test” option is selected and click Failover

4-4-1

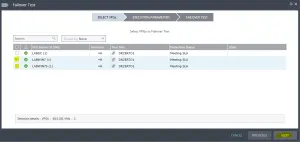
Failover Test window will pop up. Select you VPGs that you want to test and select next.

4-4-2

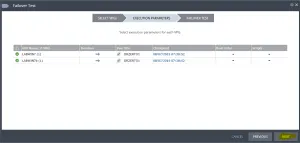
Review the Execution Parameters

4-4-3

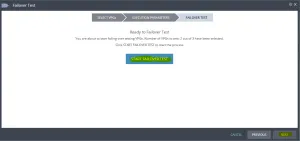
Start the Failover Test

4-4-4

Go to the Monitoring Tab to observer the failover tasks.

4-4-5

The screenshot below shows the steps that are taking place at the target vCenter.

4-4-6

Once the Failover Test procedure has completed you will be able to bring up your VMs at the target location and begin your testing

4-4-7

Once you have completed your testing go back to the Monitor Tab.  Go to the tasks and select the red “Stop” button to end the testing.

4-4-8

The Stop Test window will pop up and ask for the “Result” and “Notes”.  Select Stop to stop the test.

4-4-9

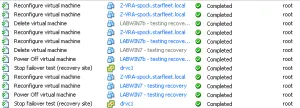
See the screenshot below to see the Teardown of the testing

4-4-10

Once the testing has been taken down it will show “Completed” under Monitoring.

4-4-11

My next blog will cover the VPG Failover process.

Zerto 4.0 Virtual Protection Groups

This is Blog 3 in the Zerto Replication 4.0 Series.  This blog will cover the Virtual Protection Group (VPG) setup.

Current Setup

  • Production Cluster of 2 hosts
  • DR Cluster of 1 host
  • ZVM has been deployed at both sites on Windows 2012 R2
  • VRAs have been installed at each site
  • Sites have been paired

VPG Creation

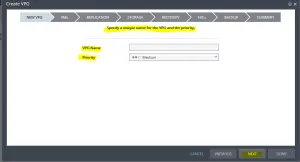
Once you have logged into the ZVM Interface go to “VPGs” and “New VPG”

4-3-1

Specify a VPG Name and the Priority Level

4-3-2

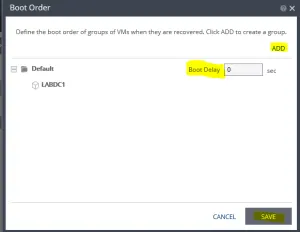
Select the VMs available that you need to protect. Define the boot order and the boot delay.

4-3-3

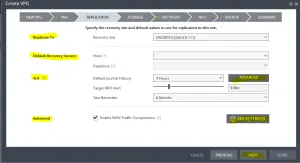
At this point you are ready to define the replication.

Replicate To: Define the Recover Site

Default Recover Servers: Define Cluster/Host and Datastore for Protection

SLA: Define Journal History, Target RPO Alerting and a Test Reminder. The advanced journal settings tab will be detailed next.

Advanced: Enable WAN Compression (Like this feature!)

4-3-4

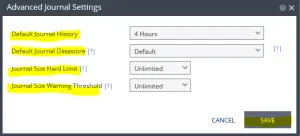
Advanced Journal Settings

You can define the Journal History, Journal Datastore, Journal Size Hard Limit and Journal Size Warning Threshold

4-3-5

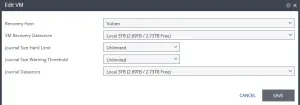
You can also edit an individual VM by selecting VM Settings

4-3-6

There you can change these default options

4-3-7

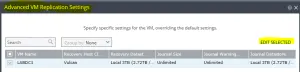
The next step is to review or change the storage selection.  If you need to change the target then “Edit Selected” after selecting the VM

4-3-8

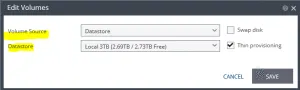
You can then define the Volume Source and Target Datastore

4-3-9

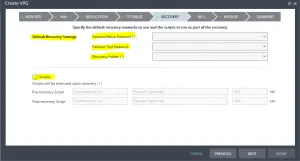
Next Step is Recovery.  You will define the following:

Failover/Move Network, Failover Test Network and the Recovery Folder.  You can also define any scripts that you may need to run.

4-3-10

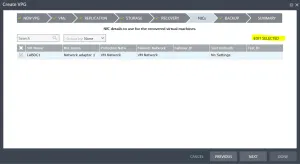
Review the NICs Section. Here you can edit individual VMs. This is need if you need to change IPs in the event of a failover or test.

4-3-11

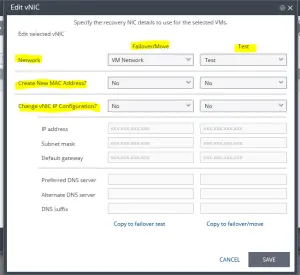
Define the Network, MAC Address and IP configuration for testing and failover

4-3-12

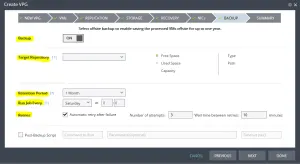
There is an option for a “Backup” as well.  I will not be going over this but below is a screenshot of what you can do.

4-3-13

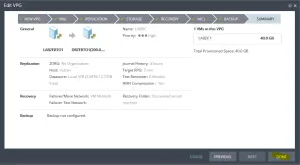
Summary of the VPG. Click done to start Replication

4-3-14

Go back to the VPG Section and the VPG will now be listed and in “Initial Sync”.

4-3-15

Once it has completed you will see several different things including SLA and RPO.

4-3-16

You can then toggle over to performance and see actual performance related stats

4-3-17

My next blog in the series will cover the “Test Failover”.

Zerto 4.0 VRA Install and Site Pairing

This is Blog 2 in the Zerto Replication 4.0 series.  This blog will cover the Virtual Replication Appliance (VRA) install as well as Site Pairing.  To find out more about Zerto go to Zerto.com

Current Setup

  • Production Cluster of 2 hosts
  • DR Cluster of 1 host
  • ZVM has been deployed at both sites on Windows 2012 R2

VRA install

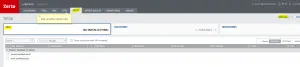
Login to the ZVM interface and go to “Setup” tab.  Click “New VRA” to begin deploying VRAs.

4-2-1

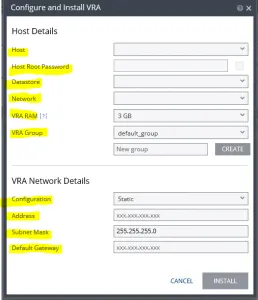
Complete the Host Details for the VRA and Network Details for the VRA then click “Install”.

4-2-2

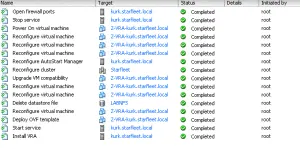
Once you complete the Install Wizard several things will happen including VRA deployment, DRS rules keeping VRAs on separate hosts and Opening Firewall Ports.

4-2-3

Once you have deployed the VRAs you will see them under the “Setup” Tab.

4-2-4

Do this at you DR site as well. I have setup 1 VRA per host in each cluster.  Now let’s move on to Site Pairing.

Site Pairing

Login to the ZVM interface and go to “Sites” tab.  Select the “Pair” option.

4-2-5

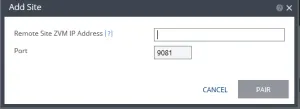
Add Site

4-2-6

Your Sites will pair

4-2-8

At this point you can go to “Sites” in the ZVM and see your DR Site

4-2-7

My next blog in the series will cover Virtual Protection Group (VPG) creation