Zerto Virtual Protection Groups (VPG)

This is Blog 3 of 5 on Zerto Replication.  This blog will cover how to create Virtual Protection Groups (VPG).  A VPG is a group of VMs that need to be grouped together for replication purposes.  An example would be an application server and a database server.  A more specific example would be an instance like Microsoft Exchange.  Typically you have 2 to 3 servers for Exchange (Database, Software and Web) and they need to be in sync at all times.

What you need to have in place before you Create a VPG

  • ZVM at both sites
  • The sites paired
  • VRAs deployed at both sites
  • VPGs already planned out

1. Login to Zerto.  Every tab in Zerto has the “New VPG” option at the top right.  Select New VPG

Image

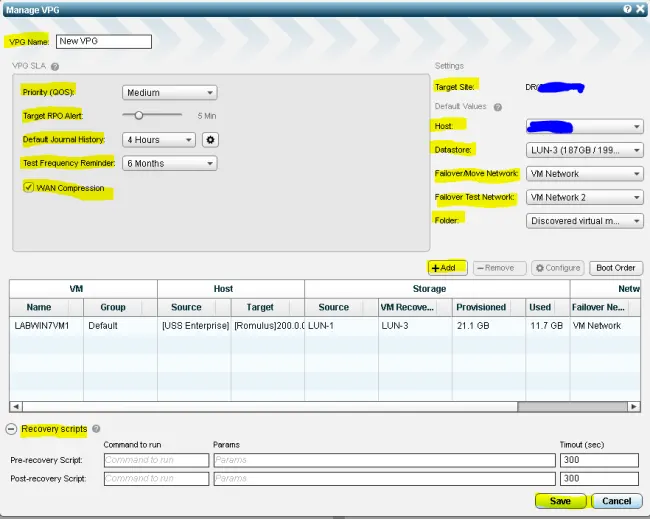
2. There are several setting that you need to set here. First off you want to name the VPG

Right Side

  • Target Site – The site you are replicating to
  • Host – The Host you want the VMs in the VPG to reside on.  You also have the option of selecting a cluster
  • Datastore – Target Datastore for the replicated VMs
  • Failover Move Network – The network you want the VMs to use in the event of a failover
  • Failover Test Network – The network you want the VMs to use when test your VPGs.  The idea is to be able to bring up the replicated VMs in a “Test bubble” or isolated VLAN so that there is no production issues during testing.
  • Folder – The organizational folder you want the VMs to be in

Left Side

  • Priority (QOS) – The priority of the VPG
  • Target RPO Alert – The maximum time between each automatic checkpoint being written to the journal before an alert is issued.
  • Default Journal History – The time for which all write commands are saved in the journal
  • Test Frequency Reminder – How often you want to test your VPG.  If you don’t reach that time period you will get an alert
  • Wan Compression

There is also an option for recovery scripts at the bottom
 Image

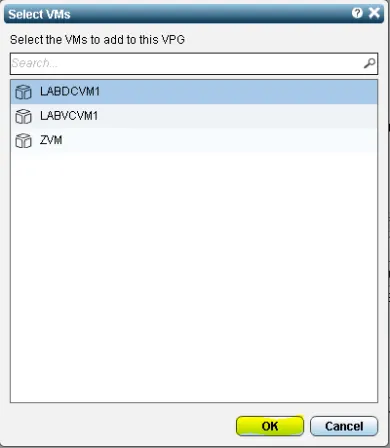
3. After all that is completed then you can add your VMs to the VPG
Image

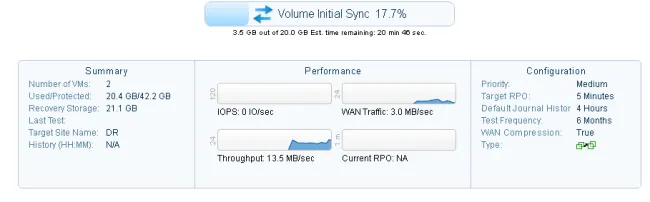
After your VPG is complete you can select it and monitor the progress of the initial Sync and review the mapping of resources to DR.  Overall a simple process.
Image

Image

The next blog will discuss Testing a VPG as well as a VPG failover
Zerto Replication Appliance Deployment

This is Blog 2 of 5 on Zerto Replication. This blog will cover pairing 2 different sites as well as installing the Zerto Virtual Replication Appliance (VRA). This is needed for replicating VMs from one site to the other.

Recommend prerequisites for VRA
• Have the ZVM already installed at each site as well as have them paired
• 1 VRA per ESXi host at each site
• Have your network, IP addresses and storage ready

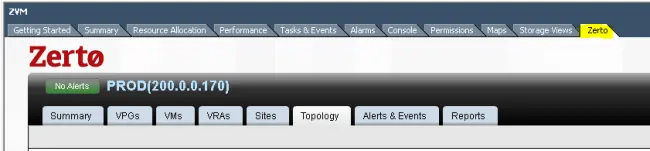
I would like to point out one of the cool features of Zerto, the VMware Plugin for the vSphere client. You can access Zerto without having to login through a Web Browser by selecting the Zerto Tab.  It is installed automatically after ZVM has been deployed.

 Image

 Pairing the Sites

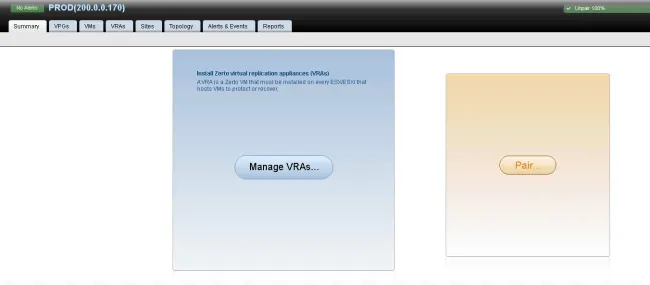
1. Once you are in Zerto go to the summary tab and select “Pair”

Image
2. Select the “Add New Site” in the upper right hand corner

Image
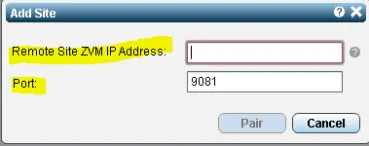
3. Add Site

Image
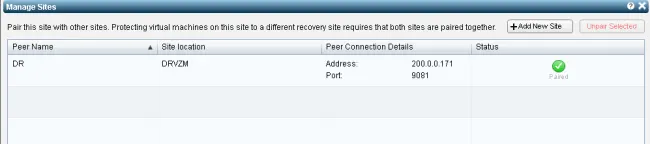
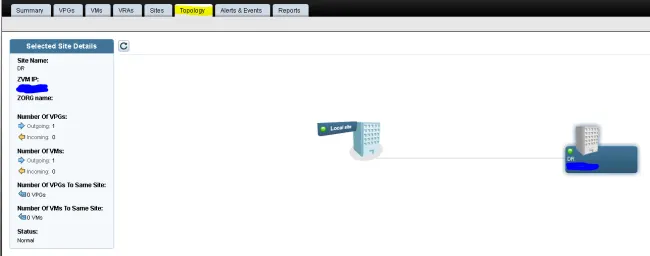
4. You will get a Green Check once it is complete. Then you will be able to see the DR site in the “Sites” tab as well as the “Topology” Tab.

Image

Image

Image

Installing the VRA
1. To begin replication you need to install a VRA at both sites. Select you ESXi host and then go to the “VRAs” tab and select “actions” and then “Install”.

Image
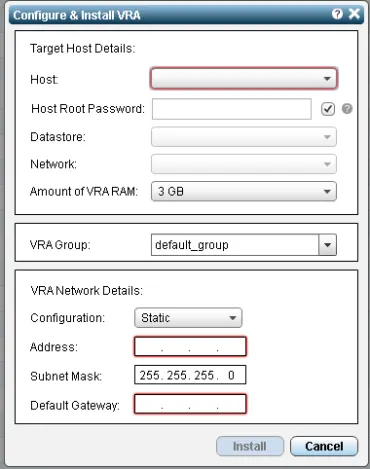
2. This is where you put in all of your settings for the VRA

Image
3. The VRA will initialize. The ZVM will deploy a virtual appliance with the settings you put in. Once the VRA is initialized you are finished.

Image

Lets Recap Zerto so far:
• We have installed the Zerto Virtual Replication Manager (ZVM) at both sites
• Paired the sites
• Installed the Zerto Replication Appliance (VRA) at both sites

The next blog will cover Virtual Protection Groups (VPG), which is the last step for setting up recovery with Zerto.

Zerto Virtual Replication Manager (ZVM) 3.1 Install

I have installed Zerto in my home lab and setup replication from one cluster to another to demo a DR scenario.  Below is the step-by-step install for a Zerto Virtual Replication Manager (ZVM) Express Setup. 

My Home Lab Setup

Hardware

  • 2 Desktop Cases
  • 2 Intel i5 Processors (1 per host)
  • 16GB Memory per host
  • 3 1GB nics per host (1 for Management, 1 for vMotion and FT, and 1 for iSCSI)
  • HP 1810 8 port managed switch
  • Synology DS 413j with 4 2TB disks with Raid 1/0

Setup

  • Prod and DR Cluster
  • 1 host per cluster with vSphere 5.5
  • 1 Domain Controller (08R2) per site
  • 1 vCenter Virtual Appliance (5.5) per site
  • 1 Zerto Virtual Manager Sever and Zerto Virtual Replicator Per site.
  • 1 Windows 7 and XP VM per site

Zerto Requirements and Pre-installation

  • Windows Server 2003 SP2 or higher up to Windows Server 2012R2.  I recommend a 64-bit OS
  • 2 CPUs and 4GB RAM
  • Microsoft .net 4.0 and higher
  • At least 2GB of free disk space
  • Of course there is several Windows Firewall settings.  Refer to “Zerto Virtual Manager Installation and Initial Configuration Guide”.
  • Download Installer form Zero.

 Installation

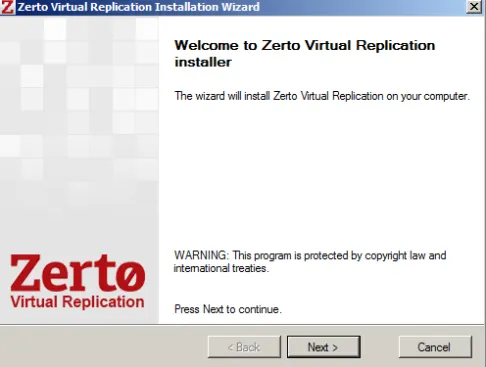
  1.  Launch the Zerto Virtual Replication installer

Image

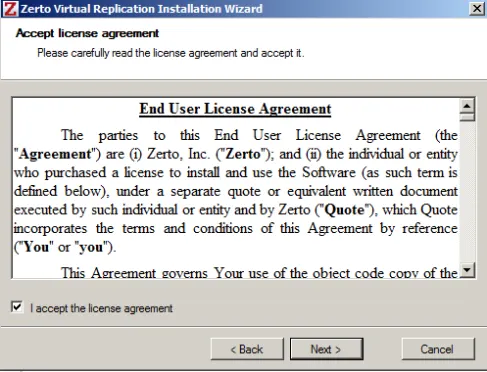
  1. Accept the license Agreement

Image

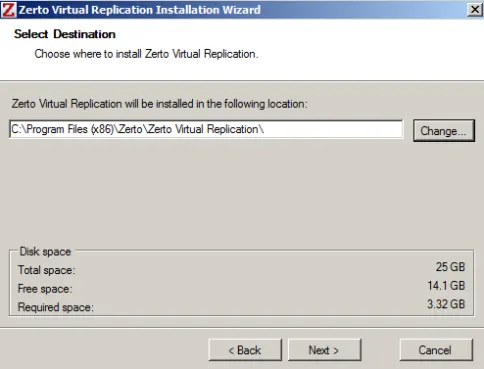
    3. Select the destination for the install files

 Image

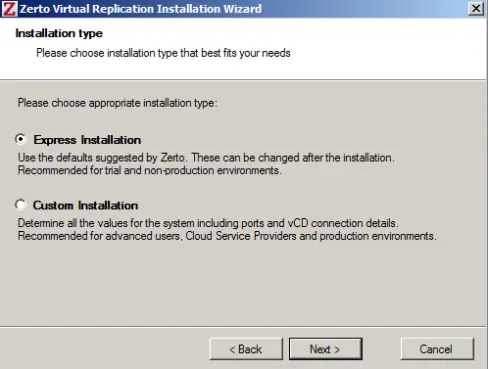
  1. Express Install

 Image

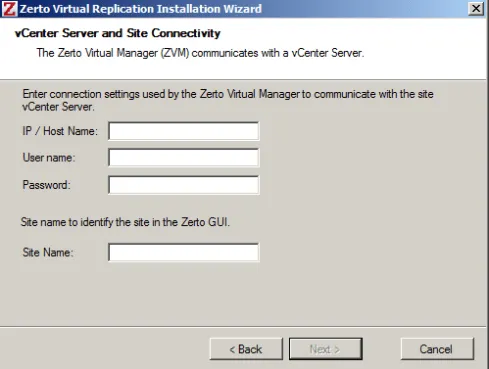
    5. vCenter Server and Site Connectivity

 Image

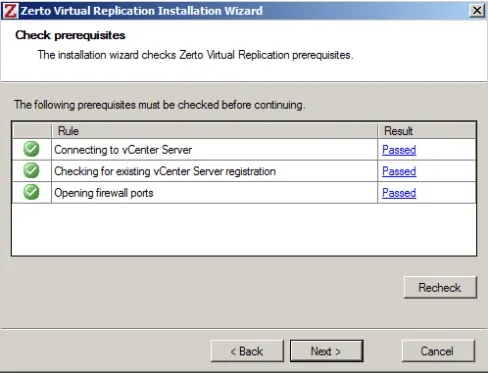
  1. Checks Prerequisites

 Image 

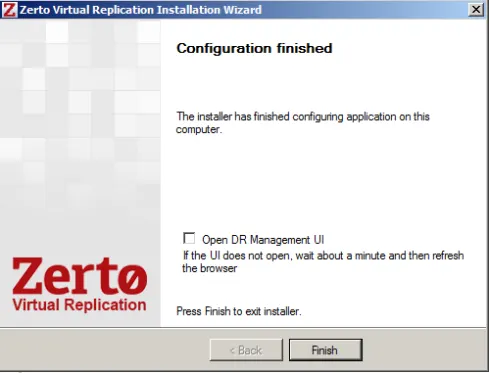
  1. Finish

 Image

  1. Login and get Started

Image

As you can see the initial setup for the ZVM is as simple as it gets.  I will go over Zerto Replication Appliances (VRA) deployment as well as Replication in my next blog post.  Refer to Zerto.com for any additional information.